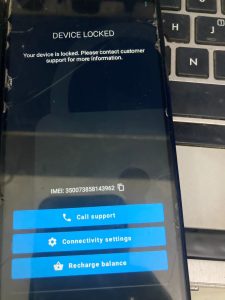
Are you having trouble accessing your TA-1332 Nokia x10 mdm or m-kopa because of a device lock imposed by Mobile Device Management (MDM)? If yes, then you’re in the right place. This article will provide you with mdm file download link to remove the your device lock from your Nokia x10 TA-1332 m-kopa or mdm.
Download the latest Nokia x10 MDM file Mkopa pandora box permanent, NOKIA TA-1332 MDM Mkopa firmware ROM flash file for pandora box
also check: Nokia c30 ta-1359 mdm file mkopa unlock firmware flash file pandora – Nokia c30 mdm file mkopa
What is MDM?
MDM is a software solution that enables organizations to manage and secure mobile devices such as smartphones, tablets, and laptops. It provides IT administrators with the ability to remotely manage and configure mobile devices, enforce security policies, and ensure compliance with company policies and regulations.
One of the primary benefits of MDM is that it enables IT departments to manage devices regardless of their location. With MDM, IT administrators can remotely deploy software updates, troubleshoot device issues, and wipe devices in case of loss or theft.
What is M-kopa?
M-KOPA is a pay-as-you-go solar energy provider that is revolutionizing the way households in East Africa access affordable and reliable electricity. Founded in 2011 in Kenya, M-KOPA has been successful in providing energy solutions to over 1.5 million households in Kenya, Uganda, and Tanzania.
The company’s business model is simple yet innovative. Mkopa provides households with solar home systems that include a solar panel, battery, LED lights, a phone charger, and a solar-powered radio and smart phone.
How to Download Nokia x10 TA-1332 MDM File Firmware?
If you’re a Nokia x10 TA-1332 user, you might be wondering how to download the MDM file firmware for your device. The MDM file firmware is essential for maintaining the functionality of your device and fixing any issues like mkopa or payjoy or mdm that you might be facing.

to download the firmware no need more action its easy just click below download button:
nokia x10 mdm file.zipfor password conact owner WhatsApp number: +255755889265
NOTE: Please note that the file you want to download is a paid file and not available for free. As a paid file, it is important to recognize the value and effort put into creating it. By purchasing and supporting paid files, we can ensure that creators are compensated for their hard work and continue to produce high-quality content.
also download: Nokia G21 TA-1418 mdmfile mkopa firmware pandora
Download also below:
- Nokia c30 ta-1359 mdm file mkopa unlock firmware flash file pandora
- Nokia G21 mdm file m-kopa firmware for Pandora
- Nokia c10 mdm file mkopa pandora
- Nokia c21 plus ta-1433 mdm file mkopa unlock firmware flash file pandora
How to unlock nokia x10 mdm devices lock or M-kopa lock
Flashing your Android phone can be a daunting task, especially if you are not familiar with the process. However, with the right guidance, you can easily do it. This guide will take you through the process of flashing an MDM Super.bin file on your Android phone.
Guide to Flashing MDM Super.bin file on Android Phone
In this article, we will guide you through the step-by-step process of dumping and restoring the MDM super.bin file.
Step 1: Dumping the MDM Super.bin File:
The first step is to dump the MDM super.bin file from your device. To do this, open your device’s Pandora and click on “Read Partitions.” Then unselect all partitions except the super.bin file and dump it. Once you have done this, you can move on to the next step.
Step 2: Restoring the MDM Super.bin File:
Next, you need to restore the MDM super.bin file. To do this, go to the “Flash” tab and select “Restore from Backup.” Then, select the MDM super.bin file that you shared, not your own dump. After writing this, it is crucial that you do not allow your phone to boot up. Disconnect the battery and reconnect it.
Step 3: Unlocking the Bootloader:
Now that you have restored the MDM super.bin file, it’s time to unlock the bootloader. Go to the “Locks” tab and unlock the bootloader. This step is essential to enable you to make changes to the device’s firmware and to install custom ROMs.
Step 5: Wipe Data:
After unlocking the bootloader, go to the “Format” tab and select “Wipe data.” This step will erase all your data, so make sure you have backed up everything you need.
Step 6: Remove FRP (If Necessary):
If your phone has FRP (Factory Reset Protection), you can remove it at this point.
Step 7: Boot Up Your Phone:
Finally, after completing all the steps, you can boot up your phone, and it’s done. Congratulations, you have successfully flashed MDM onto your Android phone and unlocked its bootloader.
Conclusion
flashing MDM onto your Android phone and unlocking its bootloader requires some technical know-how, but by following the steps outlined above, you should be able to do it without any issues. Just remember to proceed with caution, back up your data, and select the correct MDM file.

